(Under construction!!)
Integrate Networks and Annotation by Web Services
Contents
- Integrate Networks and Annotation by Web Services
- Introduction
-
Tutorial: Integrate Known Information about PPAR-Gamma
- Setup
-
Tutorial 1: Search by Keyword
- Import Interactions and Annotation from NCBI Entrez Gene
- Import Known Pathways and Interactions from Pathway Commons
- Import Binary Interactions from IntAct
- Import KEGG Pathway using BioRuby
- Import Pathways from WikiPathways
- Extract Interactions from Publications by Agilent Literature Search (not finished yet!)
- Import Interactions from MiMI Database (not finished yet!)
- Tutorial 2: Start from List of Genes
- Tutorial 3: Merge Multiple Networks (not finished yet!)
- Optional
Introduction
From version 2.6, Cytoscape works as a web service client for public biological databases. In this tutorial, you will learn how to use Cytoscape as a data integration platform using public databases.
What is a Web Service?
Web Service is a standardized mechanism for computers to exchange data. These days, there are lots of public biological databases accessible over the Internet. Many of them start supporting web services and accessible from client programs. This means you can search and retrieve interactions and annotations directly from client programs. Cytoscape works as a web service client from 2.6, so you can access those databases directly from your Cytoscape Desktop.
Goal of this Tutorial
You can learn the following functions of Cytoscape from this tutorial:
- How to import networks from public databases
- How to import annotations and map IDs
- Merge networks from multiple data sources
- Map known pathways onto interaction networks
This is a fairly complicated tutorial to use multiple plugins and multiple data sources, so I assume you already know basics of Cytoscape. If not, please finish the basic tutorials first.
Tutorial: Integrate Known Information about PPAR-Gamma
Setup
To do this tutorial, you need to install the following plugins:
Network/Attribute Import Clients
- Pathway Commons Plugin (installed by default)
- NCBIClient Plugin
- NCBIEntrezGeneUserInterface Plugin
- IntActWSClient Plugin
BiomartClient Plugin (0.80 and later. No GUI plugin required.)
AgilentLiteratureSearch Plugin
- MiMI Plugin
- GPML Plugin
Data Merge
AdvancedNetworkMerge Plugin
Scripting
RubyScriptingEngine Plugin
ScriptingEngineManager Plugin
Search
- Enhanced Search Plugin
Note: Out of Memory Problem
When you load a lot of plugins at once, sometimes Cytoscape crashes even if you have a lot of memory in your machine. This is because Java heap called Permanent region is full. To avoid this problem, you need to edit the following file:
# for Mac/Linux
cytoscape.sh

# for Windows
cytoscape.bat
In the file, you can see the following options:
-Xss5M -Xmx1024M -XX:MaxPermSize=128m
In general, if you increase -XX:MaxPermSize, you can load many plugins at once. Default size is 64M, so probably 128M is enough in most cases.
To run Cytoscape with these options, execute the modified file from command line, simply type
cytoscape.sh
for Windows, double-click cytoscape.bat.
Tutorial 1: Search by Keyword
In this exercise, you are going to learn how to search interactions by keyword.
Import Interactions and Annotation from NCBI Entrez Gene
Select File-->Import-->Network from Web Services...
Set Data Source to NCBI Entrez EUtilities Web Service Client
In the Query window, type pparg AND human[ORGN]. This query means search Entrez Gene database by PPARG for human.
Press Search button. This process takes a while.
When the client finds matched entries, it pops up a confirmation dialog. Press Yes to proceed.
You will be asked to type network name. Type PPAR-Gamma from NCBI.
Select Layout-->yFiles-->Organic and apply the layout.
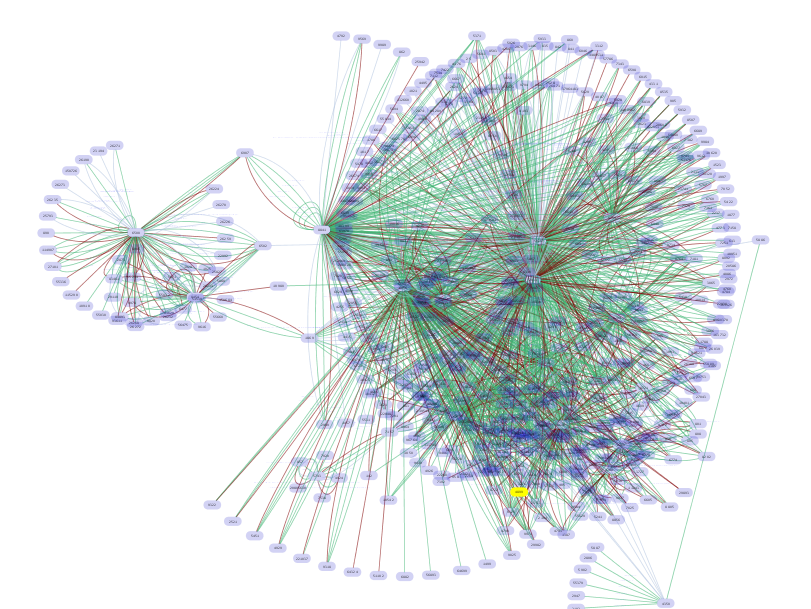
- In the main desktop, you can see a network generated from the NCBI Entrez Gene data sets. Entrez Gene stores interaction data from three databases: BIND, BioGRID, and HPRD. Edge color represents source of the interaction data.
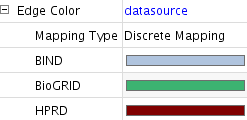
Select File-->Import-->Import Attributes from NCBI Entrez Gene
Make Sure Attribute is set to ID and check all attributes on the list
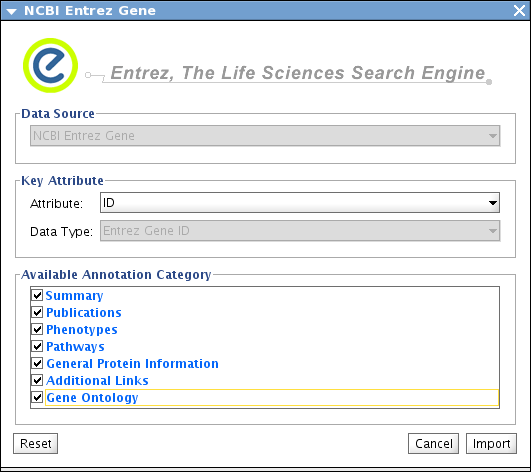
Press Import. This takes several minutes depends on network speed
- Now you have a network annotated with Entrez Gene database

Import Known Pathways and Interactions from Pathway Commons
Use Pathway Commons and search PPARG for human
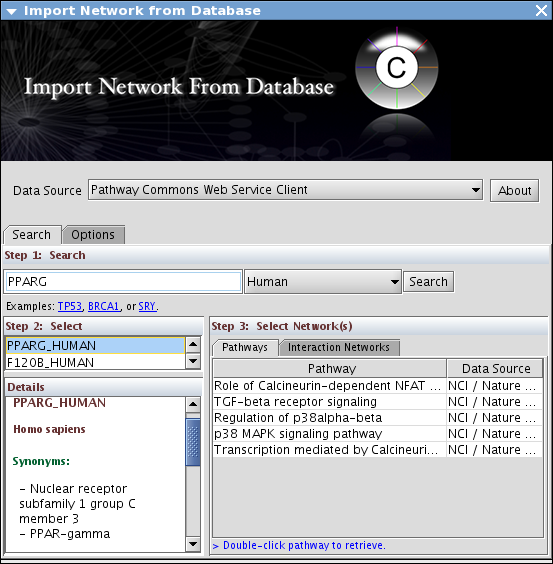
- Load all pathways and merge them into one big network
Import Binary Interactions from IntAct
Select File-->Import-->Network from Web Services...
Set Data Source to IntAct Web Service Client
In the Query box, type PPARG AND species:human
Press Search
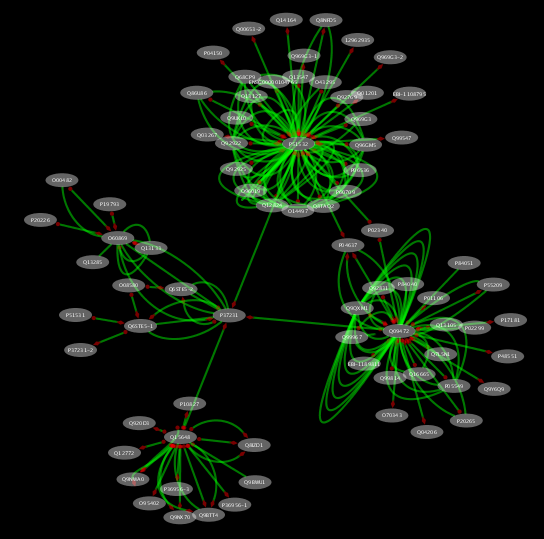
At this point, IntAct client only imports direct interactions to PPAR-Gamma.
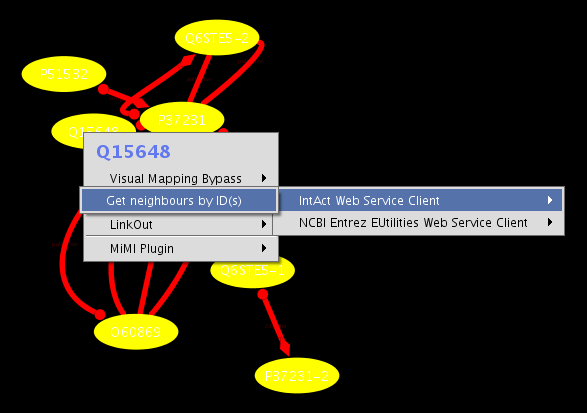
On the new network view, select all nodes. Then right-click one of the selected nodes and select Use Web Services-->IntAct Web Service Cleint-->Get neighbours by ID(s) (see the screenshot below)
- Now the network includes nodes within two hops from PPAR-Gamma.
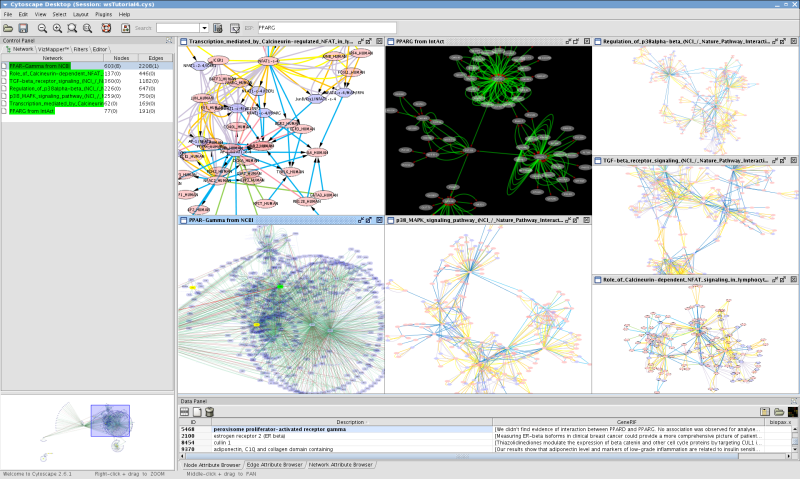
At this point, your workspace should look like the following (use View-->Arrange Network Windows-->Tiled to arrange network views):
Import KEGG Pathway using BioRuby
There are several options to import KEGG pathways, but none of them are complete due to the complex pathway data structure. At this point, the following is the most complete solution for importing KEGG Pathways.
Download the following Ruby script to your current working directory.
Select Plugins-->Scripting Language Consoles-->Open Ruby Console. This command initializes BioRuby Console and takes several moments
Check the location of your script file. cd to the location if necessary.
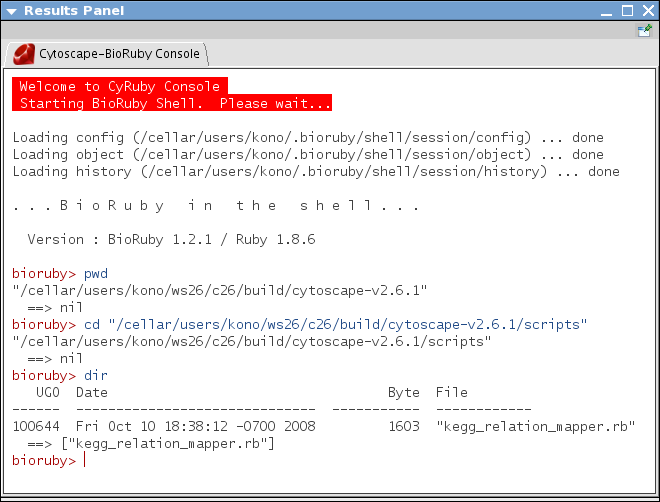
- Search the pathway related to PPAR-Gamma. From the console, type:
keggapi.bfind('pathway pparg human')This command invokes BioRuby's KEGG API, and it takes a while to be initialized. The command means search KEGG Pathway database using keyword pparg and human. The result should look like the following:
bioruby> keggapi.bfind('pathway pparg human')
JRuby limited openssl loaded. gem install jruby-openssl for full support.
http://wiki.jruby.org/wiki/JRuby_Builtin_OpenSSL
  ==> "path:hsa03320 PPAR signaling pathway - Homo sapiens (human); Peroxisome proliferator-activated receptors (PPARs) are nuclear hormone receptors that are activated by fatty acids and their derivatives. PPAR has three subtypes (PPARalpha, beta/delta, and gamma) showing different expression patterns in vertebrates. Each of them is encoded in a separate gene and binds fatty acids and eicosanoids. PPARalpha plays a role in the clearance of circulating or cellular lipids via the regulation of gene expression involved in lipid metabolism in liver and skeletal muscle. PPARbeta/delta is involved in lipid oxidation and cell proliferation. PPARgamma promotes adipocyte differentiation to enhance blood glucose uptake.\n"
bioruby>
Now we found a pathway
path:hsa03320 PPAR signaling pathway in KEGG related to PPAR-Gamma gene. Let's Import this pathway to Cytoscape. - Type:
pathway_id = 'path:hsa03320'
- Then run the script:
source 'YOUR_SCRIPT_NAME'
If the script is not in your current working directory, you need to use the full path. After few moments, you can see the following relation diagram of genes on pathway path:hsa03320 (custom VizMapper applied to the following screenshot).
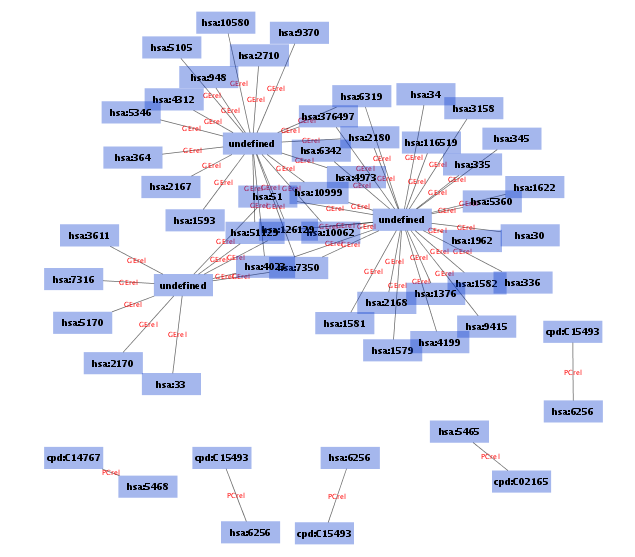
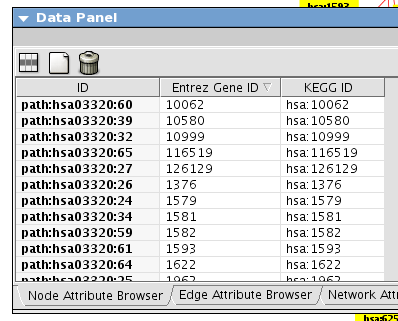
This script creates two additional attributes KEGG ID and Entrez Gene ID. You can use them for node labels to make the diagram more meaningful.
Import Pathways from WikiPathways
WikiPathways is a database of curated pathways using Wiki-style interface. Pathway data files are available as GPML format (standard data file format for GenMAPP) and they are readable in Cytoscape. In addition, GPML plugin supports direct pathway import from WikiPathways using Cytoscape's web service client framework.
Install GPML Plugin. You can install it from Plugin Manager.
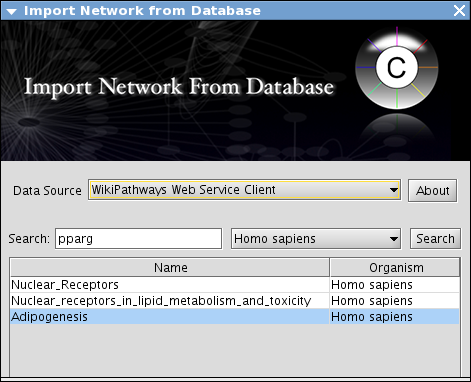
Select File-->Import-->Network from Web Services...
Set Data Source to WikiPathways Web Service Client
Type pparg in the Search text box.
Set organism to Homo Sapience and press Search.
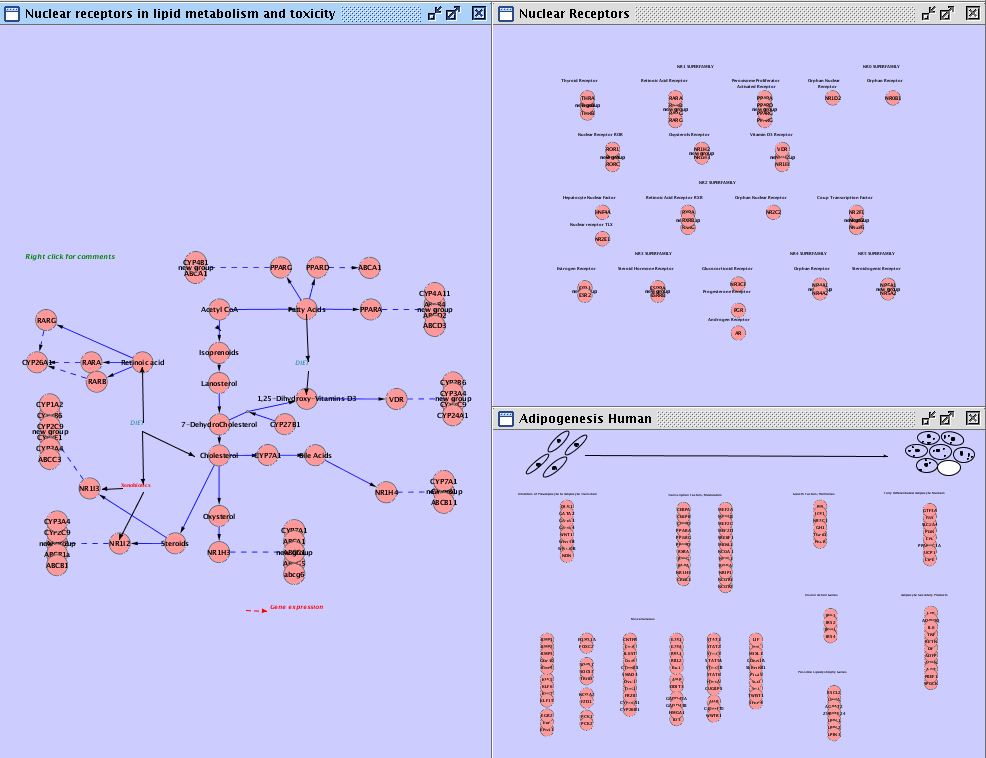
- You can see several candidate pathways. To import them, just double-click the pathway name.
Extract Interactions from Publications by Agilent Literature Search (not finished yet!)
Please try Literature Searching tutorial first. In this section, you will learn how to add extra annotations to the generated network by Agilent Literature Search.
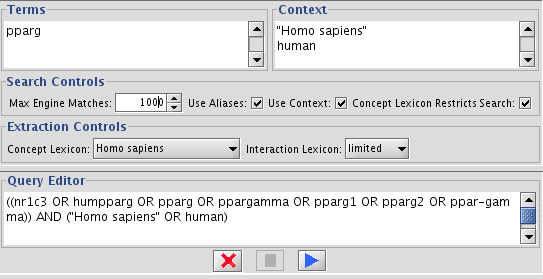
Start Agilent Literature Search from Plugins-->Agilent Literature Search
In the Terms window, type pparg
Increase the Max Engine Matches to 1000
Check Use Aliases
- Start search by pressing blue triangle icon.
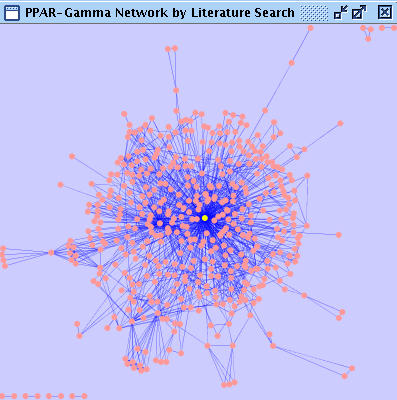
After few minutes, new network will be generated from publication data. Right-click the network name and name it PPAR-Gamma Network by Litelature search.
At this point, this network does not have annotations/ID sets for nodes. To add some more information for this network, you can use BioMart web service client. Before importing annotations from BioMart, you need to make a new attribute from node IDs. Node IDs generated by Agilent Literature Search is all lower-case. However, human Gene Symbols are usually represented as upper case. Since Cytoscape is case-sensitive, the following process is required. Create new String attribute by clicking Name it Click the Select Select Operation tab and set command to
Create New Attribute icon in Attribute Browser.
Press Go. 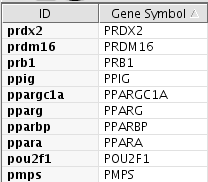
Now you are ready to add some annotations to the generated network.
Select File-->Import-->Import Attributes from BioMart...
Set Data Source to ENSEMBL GENES (Homo Sapience)
Select Gene Symbol as the key attribute, and Data Type should be HGNC Symbol
- Select some annotations from the list.
Press Import
- Matched attributes will be mapped to the nodes on the current network.
In this example, I imported some ID sets including NCBI Entrez Gene ID. Let's import some more annotations from NCBI by using Entrez Gene ID as the key.
Usually, In such case, you can use some command line tools to create ID mapping table for Cytoscape.
In the Attribute Browser, select How can we annotate genes not found in BioMart?
Create Gene Symbol Mapping Table by BioRuby
EntrezGene ID and Gene Symbol
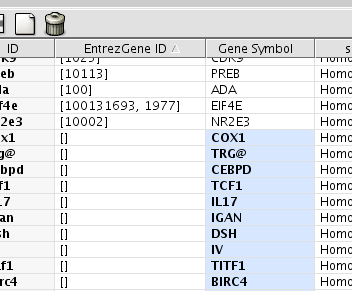
Sort the attributes by EntrezGene ID. Then you can see nodes which are not annotated by BioMart.
Open Ruby Console. Create a string variable symbols and paste the Gene Symbols bioruby> symbols
==> "COX1\nTRG@\nCEBPD\nTCF1\nIL17\nIGAN\nDSH\nIV\nTITF1\nBIRC4\nNGFB\nFRIZZLED\n1.9.3.1\nGPR40\nMAFD2\nMHC2TA\nBCATENIN\nTNFSF6\nNF-KAPPAB\nPBEF1\nCTAA1\nMCP\nCEBPA\nTNFRSF6\nIFN-ALPHA\n1.13.11.17\nFOXO1A\nAPLN\nRN7SK\nKRAS2\n3.6.3.14\nTHRAP4\nTPRT\nCTSL\nTNFA\nKRTHBP1\nPDR\nHIS1\nCSE\nPKB\nTGFB\nG22P1\nPPARBP\nCOPD\nTNFRSF5\nMCS\nRNH\nCUTL1\nCSEN\nVEGF\nACDC\nMALAT1\nPKC\nIPF1\nPAP\nAXPC1\nZNF42\n1.3.99.1\nCOX2\nACF\nPMPS\n4.1.1.38\nDSCR1\nACTIN\nNA\nHYPB\n6.2.1.7\nNBS1\nPGS\nBTF3L1\n2.7.1.64"
bioruby> query.gsub(/\n/, " OR ")
  ==> "COX1 OR TRG@ OR CEBPD OR TCF1 OR IL17 OR IGAN OR DSH OR IV OR TITF1 OR BIRC4 OR NGFB OR FRIZZLED OR 1.9.3.1 OR GPR40 OR MAFD2 OR MHC2TA OR BCATENIN OR TNFSF6 OR NF-KAPPAB OR PBEF1 OR CTAA1 OR MCP OR CEBPA OR TNFRSF6 OR IFN-ALPHA OR 1.13.11.17 OR FOXO1A OR APLN OR RN7SK OR KRAS2 OR 3.6.3.14 OR THRAP4 OR TPRT OR CTSL OR TNFA OR KRTHBP1 OR PDR OR HIS1 OR CSE OR PKB OR TGFB OR G22P1 OR PPARBP OR COPD OR TNFRSF5 OR MCS OR RNH OR CUTL1 OR CSEN OR VEGF OR ACDC OR MALAT1 OR PKC OR IPF1 OR PAP OR AXPC1 OR ZNF42 OR 1.3.99.1 OR COX2 OR ACF OR PMPS OR 4.1.1.38 OR DSCR1 OR ACTIN OR NA OR HYPB OR 6.2.1.7 OR NBS1 OR PGS OR BTF3L1 OR 2.7.1.64"
bioruby> query = '(' + query + ') AND human[ORGN]'
==> "(COX1[SYM] OR TRG@[SYM] OR CEBPD[SYM] OR TCF1[SYM] OR IL17[SYM] OR IGAN[SYM] OR DSH[SYM] OR IV[SYM] OR TITF1[SYM] OR BIRC4[SYM] OR NGFB[SYM] OR FRIZZLED[SYM] OR 1.9.3.1[SYM] OR GPR40[SYM] OR MAFD2[SYM] OR MHC2TA[SYM] OR BCATENIN[SYM] OR TNFSF6[SYM] OR NF-KAPPAB[SYM] OR PBEF1[SYM] OR CTAA1[SYM] OR MCP[SYM] OR CEBPA[SYM] OR TNFRSF6[SYM] OR IFN-ALPHA[SYM] OR 1.13.11.17[SYM] OR FOXO1A[SYM] OR APLN[SYM] OR RN7SK[SYM] OR KRAS2[SYM] OR 3.6.3.14[SYM] OR THRAP4[SYM] OR TPRT[SYM] OR CTSL[SYM] OR TNFA[SYM] OR KRTHBP1[SYM] OR PDR[SYM] OR HIS1[SYM] OR CSE[SYM] OR PKB[SYM] OR TGFB[SYM] OR G22P1[SYM] OR PPARBP[SYM] OR COPD[SYM] OR TNFRSF5[SYM] OR MCS[SYM] OR RNH[SYM] OR CUTL1[SYM] OR CSEN[SYM] OR VEGF[SYM] OR ACDC[SYM] OR MALAT1[SYM] OR PKC[SYM] OR IPF1[SYM] OR PAP[SYM] OR AXPC1[SYM] OR ZNF42[SYM] OR 1.3.99.1[SYM] OR COX2[SYM] OR ACF[SYM] OR PMPS[SYM] OR 4.1.1.38[SYM] OR DSCR1[SYM] OR ACTIN[SYM] OR NA[SYM] OR HYPB[SYM] OR 6.2.1.7[SYM] OR NBS1[SYM] OR PGS[SYM] OR BTF3L1[SYM] OR 2.7.1.64) AND human[ORGN]"bioruby> ncbi = Bio::NCBI::SOAP.new
JRuby limited openssl loaded. gem install jruby-openssl for full support.
http://wiki.jruby.org/wiki/JRuby_Builtin_OpenSSL
ignored element: {http://www.w3.org/2001/XMLSchema}sequence of WSDL::XMLSchema::Sequence
ignored element: {http://www.w3.org/2001/XMLSchema}choice of WSDL::XMLSchema::Sequence
ignored element: {http://www.w3.org/2001/XMLSchema}choice of WSDL::XMLSchema::Sequence
ignored element: {http://www.w3.org/2001/XMLSchema}sequence of WSDL::XMLSchema::Sequence
ignored element: {http://www.w3.org/2001/XMLSchema}sequence of WSDL::XMLSchema::Sequence
ignored element: {http://www.w3.org/2001/XMLSchema}choice of WSDL::XMLSchema::Sequence
ignored element: {http://www.w3.org/2001/XMLSchema}sequence of WSDL::XMLSchema::Sequence
==> #<Bio::NCBI::SOAP:0x7342054 @log=nil, @wsdl="http://www.ncbi.nlm.nih.gov/entrez/eutils/soap/eutils.wsdl", @driver=#<SOAP::RPC::Driver:#<SOAP::RPC::Proxy:http://www.ncbi.nlm.nih.gov/entrez/eutils/soap/soap_adapter_1_5.cgi>>>bioruby> match = ncbi.run_eSearch('db' => 'gene', 'term' => query, 'RetMax' => '10000')
==> #<SOAP::Mapping::Object:0x94 {http://www.ncbi.nlm.nih.gov/soap/eutils/esearch}Count="87" {http://www.ncbi.nlm.nih.gov/soap/eutils/esearch}RetMax="20" {http://www.ncbi.nlm.nih.gov/soap/eutils/esearch}RetStart="0" {http://www.ncbi.nlm.nih.gov/soap/eutils/esearch}IdList=#<SOAP::Mapping::Object:0x96 {http://www.ncbi.nlm.nih.gov/soap/eutils/esearch}Id=["378938", "3605", "5743", "388732", "7124", "2308", "7080", "7040", "4683", "4663", "9370", "6965", "6932", "6927", "4513", "4512", "2185", "30818", "23590", "4261"]> {http://www.ncbi.nlm.nih.gov/soap/eutils/esearch
.
.
.bioruby> id_list = match.idList
==> #<SOAP::Mapping::Object:0xa {http://www.ncbi.nlm.nih.gov/soap/eutils/esearch}Id=["378938", "3605", "5743", "388732", "7124", "2308", "7080", "7040", "4683", "4663", "9370", "6965", "6932", "6927", "4513", "4512", "2185", "30818", "23590", "4261", "1827", "25767", "11334", "11333", "4184", "4183", "4179", "8862", "8853", "6488", "4096", "1523", "1514", "3845", "1483", "1433", "85340", "10914", "3711", "260431", "22819", "10884", "6050", "6028", "3651", "387569", "29974", "10614", "8215", "3439", "1052", "1050", "8114", "5742", "3346", "958", "822", "5469", "690", "10135", "5377", "559", "60498", "55655", "50818", "50807", "5242", "2864", "7593", "5171", "372", "356", "355", "331", "125050", "29072", "9862", "7435", "7422", "5068", "207", "2547", "103", "4803", "55", "6775083", "6775079"]>
bioruby> idString = id_list.id.join(",")
==> "378938,3605,5743,388732,7124,2308,7080,7040,4683,4663,9370,6965,6932,6927,4513,4512,2185,30818,23590,4261,1827,25767,11334,11333,4184,4183,4179,8862,8853,6488,4096,1523,1514,3845,1483,1433,85340,10914,3711,260431,22819,10884,6050,6028,3651,387569,29974,10614,8215,3439,1052,1050,8114,5742,3346,958,822,5469,690,10135,5377,559,60498,55655,50818,50807,5242,2864,7593,5171,372,356,355,331,125050,29072,9862,7435,7422,5068,207,2547,103,4803,55,6775083,6775079"bioruby> summary = ncbi.run_eSummary('db' => 'gene', 'id' => idString )bioruby> File.open("id_mapping.txt", "w") {|file|
bioruby+ entries.each { |d|
bioruby+ if d.item[8].kind_of?(String)
file.puts d.item[0] + "," + d.item[8].gsub(/, /, "|") + "," + d.id
else
bioruby+ file.puts d.item[0] + "," + "" + "," + d.id
end
}
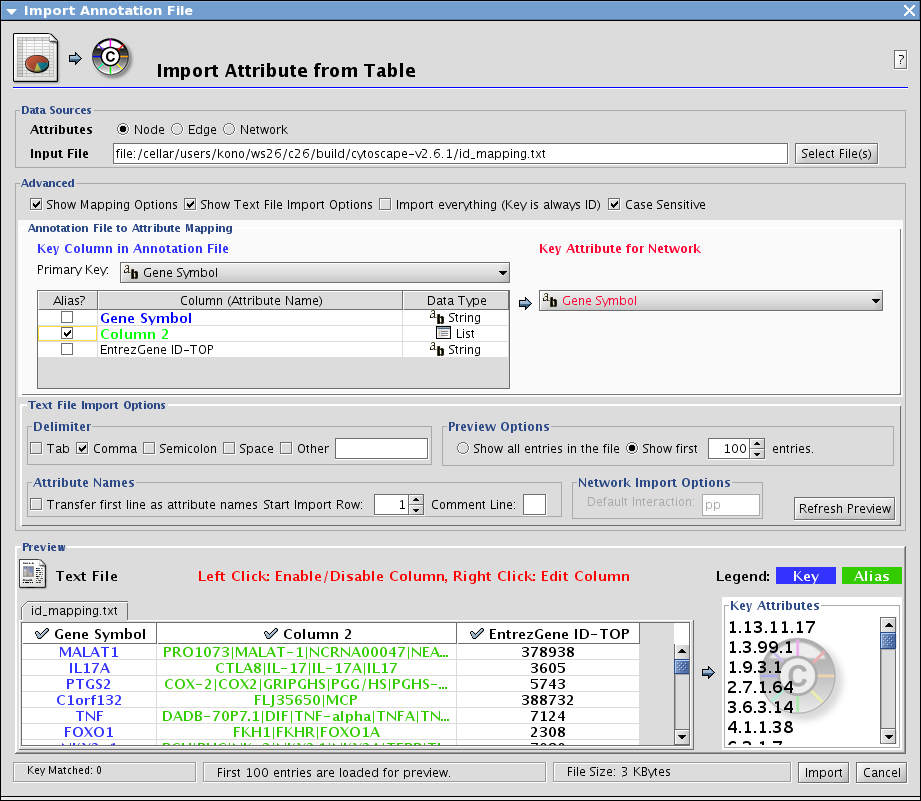
}Import the table from File-->Import-->Attribute from table
Import Interactions from MiMI Database (not finished yet!)
Tutorial 2: Start from List of Genes
Suppose you have a list of genes and you want to see known interactions of those genes in Cytoscape. In this section, you will learn how to
Import Known Interaction of Genes from Entrez Gene Database
- Prepare list of genes. In this example, we are going to use the following:
10062 10580 10998 10999 11001 116519 126129 1374 1375 1376 1579 1581 1582 1593 1622 1962 2167 2168 2169 2170 2171 2172 2173 2180 2181 2182 23305 2710 2712 284541 28965 30 3158 33 335 336 34 345 3611 364 376497 4023 4199 4312 4973 51 5105 5106 51129 5170 51703 5346 5360 5465 5467 5468 6256 6257 6258 6319 6342 642956 7316 7350 8309 8310 9370 9415 948
In this case, ID set is Entrez Gene ID. You can use other ID sets as a query, but if you use Entrez Gene ID, you can minimize the search time. Select File-->Import-->Network from Web Service
Set Data Source to NCBI Entrez EUtilities Web Service Client
Paste the gene ID list to the Query box
Press Search. Again, this process takes several minutes (depends on network status)
- Name the network and press OK.
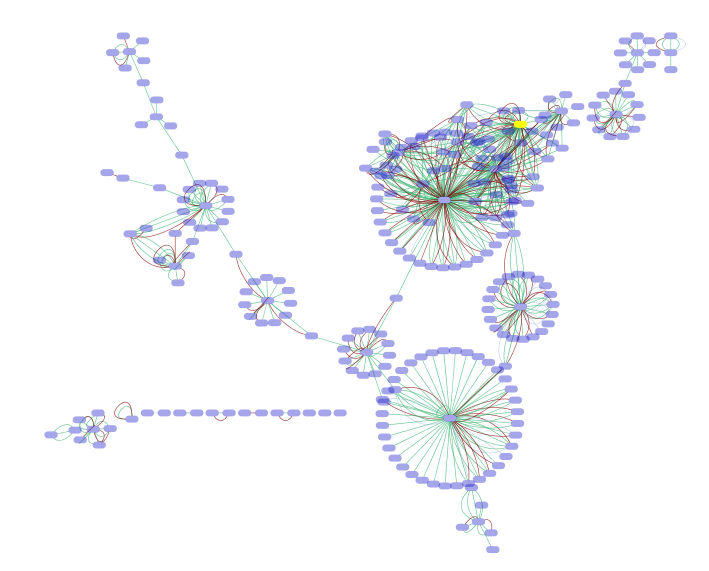
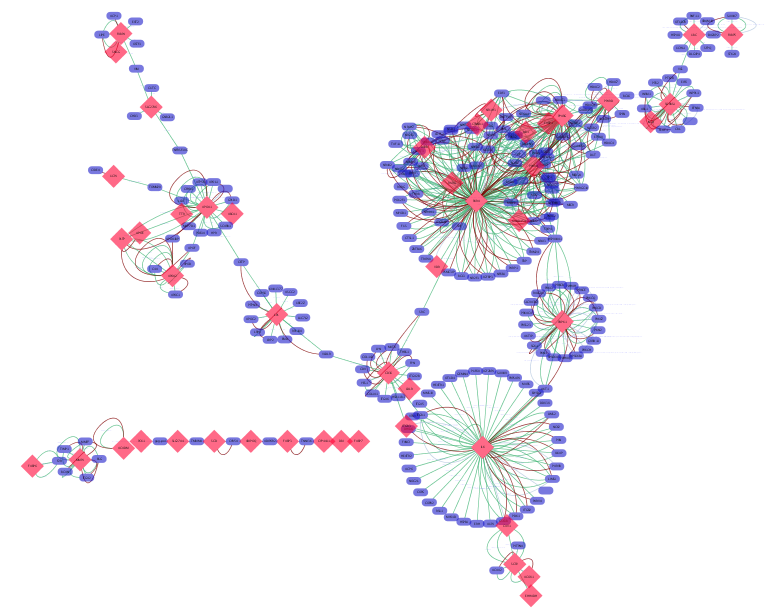
After applying Organic layout, the network looks like the following:
- Next, import annotation for them. It is same as the protocol described in the first section.
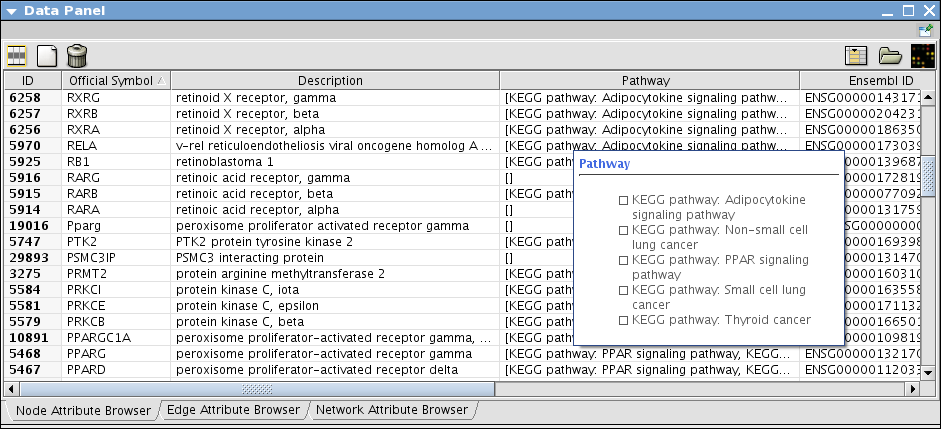
- When import is done, annotations about the genes are imported like the following:
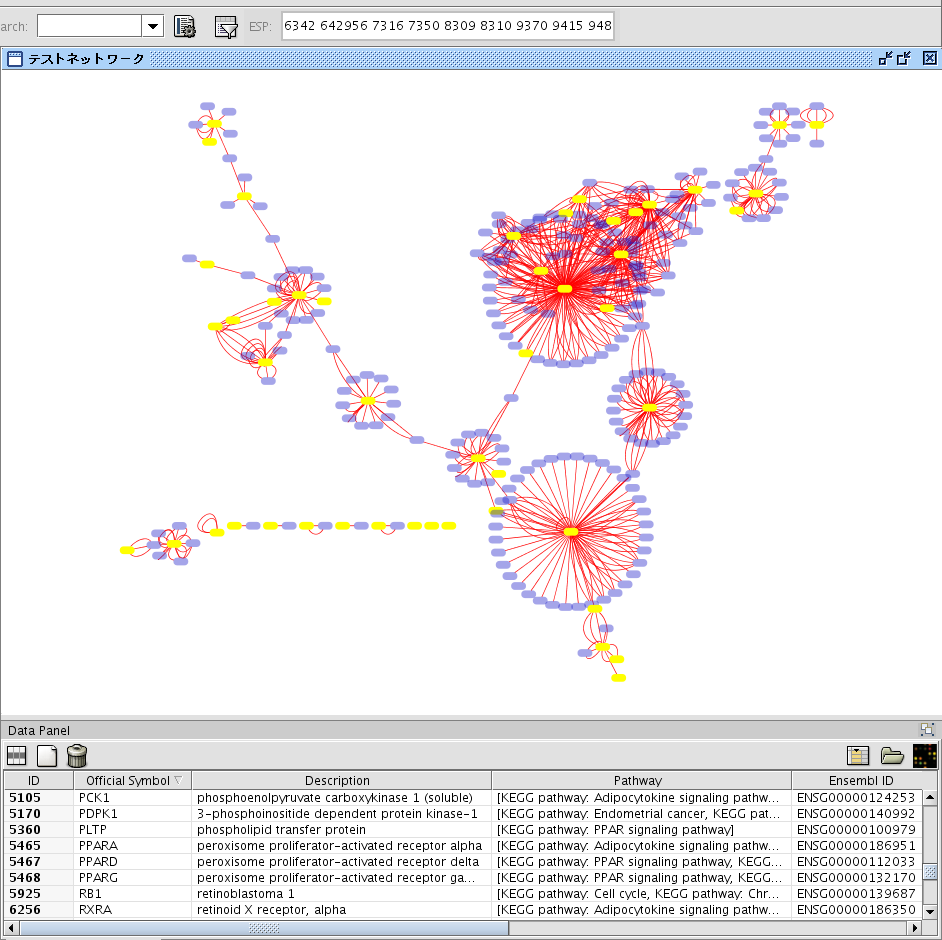
- You can check the location of the genes you entered as the query by using Enhanced Search plugin. Paste the list of gene IDs in the search ESP window on the toolbar and press enter. Genes in the original query will he selected.
Mark Original Nodes
In some cases, it is useful to remember those genes as the origin of this interaction network. This is especially useful when you merge multiple networks. You can do it by using Attribute Browser's functions.
- Assume nodes in the original query are already selected.
In the Node Attribute Browser window, you can see the icon to create new attribute. Press the icon
Select String Attribute
- Name the new attribute.
On the right side of the Browser, you can see an icon called Batch Attribute Editor. Press the icon
In the Operation tab, select Set and then select the attribute name you created from the combo box.
Type the value. In this example, I use query1 as the attribute value
Press Go. New attributes are set to the selected nodes. Close the window.
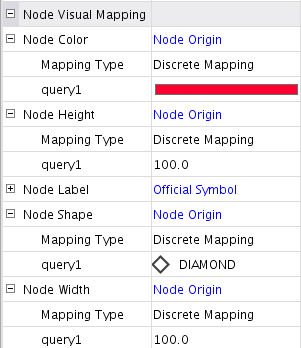
- Now you can use it in the Visual Style to see the nodes in the original list more intuitively. The following is an example to use the new attribute to control node size, shape, and color.
Tutorial 3: Merge Multiple Networks (not finished yet!)
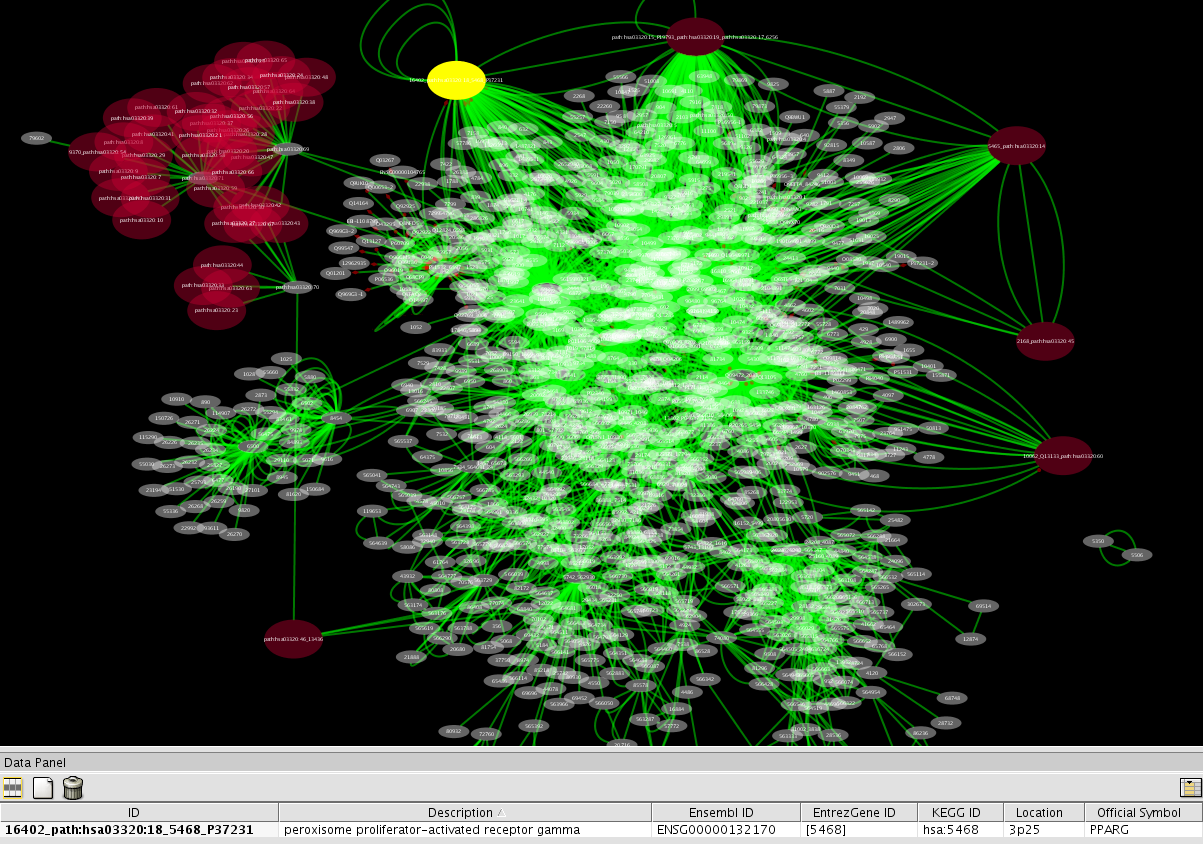
Example visualization of the integrated network. All networks are merged, and big red nodes are genes on PPAR signaling pathway (path:hsa03320) in KEGG. PPAR-Gamma is selected.
Optional
How to get list of genes on a specific pathway
This is a bit out of focus of this protocol, but here is how I got the original list of genes. To do the following, you need to install RubyScriptingEngine Plugin.
Here is how:
Open the BioRuby Console and get list of genes by using KEGG API
. . . B i o R u b y   i n   t h e   s h e l l . . .

  Version : BioRuby 1.2.1 / Ruby 1.8.6

bioruby>
- Get list of genes for KEGG Pathway mmu03320 (PPAR Signaling Pathway)
bioruby> gene_list = keggapi.get_genes_by_pathway("path:mmu03320") JRuby limited openssl loaded. gem install jruby-openssl for full support. http://wiki.jruby.org/wiki/JRuby_Builtin_OpenSSL ==> ["mmu:103968", "mmu:104086", "mmu:108078", "mmu:11363", "mmu:11364", "mmu:113868", "mmu:11430", "mmu:11450", "mmu:11770", "mmu:11806", "mmu:11807", "mmu:11814", "mmu:11832", "mmu:12140", "mmu:12491", "mmu:12894", "mmu:12895", "mmu:12896", "mmu:13117", "mmu:13118", "mmu:13119", "mmu:13122", "mmu:13124", "mmu:13167", "mmu:14077", "mmu:14079", "mmu:14080", "mmu:14081", "mmu:14626", "mmu:14933", "mmu:15360", "mmu:16202", "mmu:16204", "mmu:16592", "mmu:16956", "mmu:17436", "mmu:18534", "mmu:18607", "mmu:18830", "mmu:19013", "mmu:19015", "mmu:19016", "mmu:20181", "mmu:20182", "mmu:20183", "mmu:20249", "mmu:20250", "mmu:20280", "mmu:20411", "mmu:216739", "mmu:22190", "mmu:22227", "mmu:22259", "mmu:225579", "mmu:235674", "mmu:26457", "mmu:26458", "mmu:26459", "mmu:26569", "mmu:30049", "mmu:433256", "mmu:50790", "mmu:56473", "mmu:57875", "mmu:622384", "mmu:66113", "mmu:669888", "mmu:74147", "mmu:74205", "mmu:74551", "mmu:78070", "mmu:80911", "mmu:83995", "mmu:83996", "mmu:93732"] - Remove prefix and join them to a one query string. Since KEGG uses Entrez Gene ID as a part of their identifier, you can copy and paste the result as a list of Entrez Gene IDs.
bioruby> query = gene_list.join(" ").gsub(/mmu:/, "")
  ==> "103968 104086 108078 11363 11364 113868 11430 11450 11770 11806 11807 11814 11832 12140 12491 12894 12895 12896 13117 13118 13119 13122 13124 13167 14077 14079 14080 14081 14626 14933 15360 16202 16204 16592 16956 17436 18534 18607 18830 19013 19015 19016 20181 20182 20183 20249 20250 20280 20411 216739 22190 22227 22259 225579 235674 26457 26458 26459 26569 30049 433256 50790 56473 57875 622384 66113 669888 74147 74205 74551 78070 80911 83995 83996 93732"
bioruby>
By learning simple BioRuby commands, you can access lots of functions to access KEGG and other databases. For more information, please visit BioRuby Web Site.
