Tutorial 6: Gene Ontology Analysis with Cytoscape
Contents
The Gene Ontology (GO) is now an essential resource in bioinformatics. It defines a controlled vocabulary of terms for biological processes, molecular functions, and cellular locations, and relates the terms in a somewhat-organized fashion. Expert curators assign genes to GO categories, and the majority of genes in organisms including human and yeast now have GO annotations. This section of the tutorial outlines the resources available to you under Cytoscape for examining a network (or sub-network), and asking "but what do these genes DO?"
If you have completed the basic Cytoscape tutorials, in this tutorial you will:
- Learn how to apply GO annotations to Cytoscape nodes
- Learn how to look for enriched GO categories using the BiNGO plugin
This tutorial and accompanying lectures were delivered at CSC, the Finnish IT center for science. The lecture slides of background material and an accompanying video presentation are available courtesy of the CSC at http://www.csc.fi/english/research/sciences/bioscience/Courses_and_events/cytoscape/index_html.
This tutorial features the following plugins:
The BiNGO plugin, developed by the Computational Biology Division, Dept. of Plant Systems Biology, Flanders Interuniversitary Institute for Biotechnology (VIB), described in a publication in Bioinformatics in 2005.
and the following data file:
galFiltered.symbol.sif: a version of the file galFiltered.sif used in the introductory tutorials. In this version, the yeast locus tags are replaced with the corresponding HUGO gene symbols. Please download this file before you start by right-clicking on the hyperlink.
Install Cytoscape and the BiNGO plugin
If you have not already done so, download and install Cytoscape on your local computer, following the instructions given in the Cytoscape manual.
Download and install the BiNGO plugin, as follows:
Go to the BiNGO page at http://www.psb.ugent.be/cbd/papers/BiNGO/. This site also provides some excellent documentation on BiNGO.
- Click on the Download link at the left side of the page.
- Read the BiNGO license agreement. Accept the terms of the license by clicking the indicated button, which will start the download of a file called BiNGO.jar.
- Copy that file into your Cytoscape plugins directory.
- If you are currently running Cytoscape, exit and restart.
Load GO data
First, we shall learn the steps to load Gene Ontology and gene association data into Cytoscape.
- Start Cytoscape and load the network galFiltered.symbol.sif. As you may recall from previous tutorials, this file contains a network of yeast (S. cervisiae) proteins from the galactose pathway.
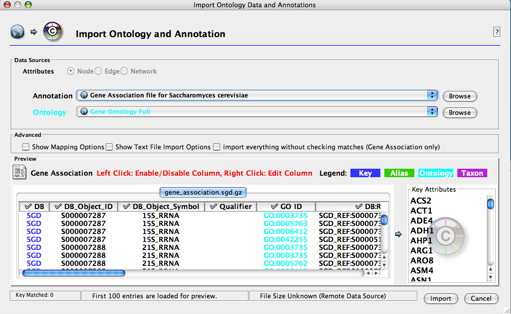
Go to File → Import → Ontology and Annotation... . In the resulting screen, select the gene association file for Saccharomyces cerevisiae in the Annotation dropdown list. The default ontology is set to Gene Ontology Full, which may take a long time to load, as it is a large file. (You can change this to Yeast GO slim to get a faster loading time.) Note that both annotations and ontologies are stored as remote URLs, therefore requiring an active internet connection for loading. Click the Import button.
- Note that gene association files are species-specific, so the species of your association file must match the species of your network. If you are studying two networks using different species, you will need to run two different instances of Cytoscape to apply the proper Gene Ontology data to your networks.
- Once the ontology and association files have been loaded, you will see a confirmation screen, as pictured below. Click the Close button.
Browse GO annotation
You can use the Quick Find function to browse through node and edge annotations, such as finding all nodes associated with a particular biological process.
Click on the Quick Find configuration button
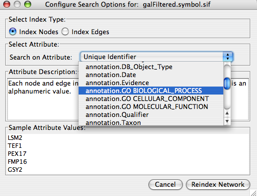
 to bring up the Quick Find settings:
 - In the "Search on Attribute" dropdown list, change the setting from Unique Identifier to annotation.GO BIOLOGICAL_PROCESS and click Index Network.
- You can now use the Quick Find search box (to the left of the settings button) to select and highlight all nodes with the same biological process. Clicking on the down arrow will show you all of the terms used and how often they appear in the network, and you can jump to a term by typing its first few letters into the search box. To highlight all the nodes containing a specific term, just click on the term in the list.
Find significant enrichment of GO terms in a network
Some areas of the network may seem to be enriched for a particular GO term. Here we will use the BiNGO plugin to see if that enrichment is statistically significant.
- For this tutorial, reduce the size of the network by creating a child network containing Gal4 (a transcription factor) and all of its neighbor nodes up to two edges away.
Go to Select → Nodes → By Name... . Enter Gal4 and click Search. Gal4 should appear highlighted in your network. Close the Select Nodes By Name window.
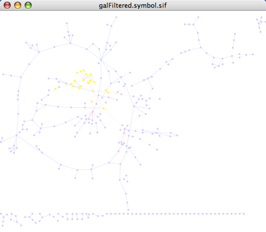
Go to Select → Nodes → First Neighbors of Selected Nodes. This will highlight Gal4 and all nodes immediately adjacent to it. Repeat to include all of the neighbors of these new nodes. Your network should now look something like this:
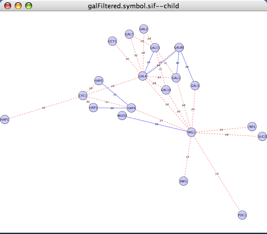
Go to New → Network → From selected nodes, all edges to create a child network.
Select all the nodes in the child network (Select → Nodes → Select all nodes) and then open the BiNGO 2.0 plugin from the Plugins menu.
- A window called BiNGO Settings will appear. Fill in the settings as follows:
- Give your cluster a short name such as "test".
- Leave the Get Cluster from Network box checked.
- Under "Select a statistical test", select Hypergeometric. Binomial testing is used when the amount of data is very large, but hypergeometric testing is appropriate for most Cytoscape usage scenarios.
Under "Select a multiple testing correction", choose Benjamini & Hochberg False Discovery Rate (FDR). This is less conservative than Bonferroni testing, but still sufficient for most cases.
- Under "Choose a significance level", enter 0.05. This threshold controls which GO classes are detailed in the output. This is not a conservative threshold, but later, one can choose GO classes with lower P values interactively.
- Under "Select the categories to be visualized", select Overrepresented categories after correction. With very few exceptions, this is the setting you will want.
- Under "Select reference set", select Test cluster versus complete annotation. This will compare your set of nodes to all genes in the yeast genome.
- Under "Select ontology", select GO_Biological_Process.
- Under "Select organism/annotation", scroll down to Saccharomyces cerevisiae.
- Optionally, BiNGO will produce a text output file listing the p-values of all nodes with significant enrichment, if you check the box marked "Check box for saving Data", click the Save BiNGO Data file button, and choose a file output directory. The file will be saved as the name of your cluster, with the BiNGO extension .bgo. It will summarize your BiNGO parameters and report on the enrichment of all terms meeting your p-value threshold.
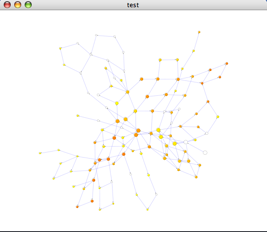
- Click the Start BiNGO button. After a brief pause, you will see a report window (containing the same information as in the .bgo file) and a network will appear on your canvas as shown below:
- Within this network:
- Each node represents GO some term, and is labeled accordingly. If you zoom into the network, you can see the labels.
- The topology depicts the hierarchy of GO biological processes. The yellow and orange nodes represent terms with significant enrichment, with darker orange representing a higher degree of significance, as shown by the legend on your screen:

- White nodes are terms with no significant enrichment, but are included because they have a significant child term. Branches of GO with no significant terms are not shown.
- The size of each node in a BiNGO graph is proportional to the number of nodes in your query set with that term.
- Go to the Node Attribute browser, and click on the Select Attributes button. You should see several new attributes (appended with the name of your cluster, in this case "test"), including:
- description_test: the name of the GO biological process
- adjustedPValue_test: the p-value for the node, adjusted for multiple hypothesis testing (note that the un-adjusted p-value is also there, with the name pValue_test, but this P value is less useful for most applications).
- n_test: the number of genes in the yeast genome with this GO term.
- x_test: the number of nodes that you have selected which have this GO term.
- N_test: the total number of genes in the yeast genome with GO annotations.
- X_test: the total number of genes that you have selected. These last four quantities are used in the calculation of the adjusted P value.
- Select these attributes. Now, select some nodes in your BiNGO graph, and look at their attributes under the Node Attribute Browser.
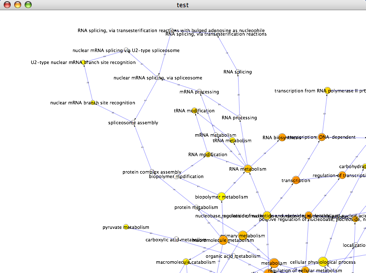
- Here is a good case for Cytoscape's hiding controls. When we zoom into this network, we see the following:
Notice how the region on the right contains two nodes of marginal significance, plus several nodes of no significance included because they are parents of these nodes. Select these nodes and go to Select → Nodes → Hide node selection.
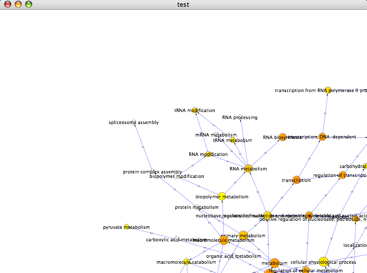
- These nodes will disappear from the canvas, as shown:
Whenever you want, you can make these nodes visible again by going to Select → Nodes → Show all nodes.
Find significant enrichment of GO terms in a subnetwork
Recall that this BiNGO graph reports on the enrichment of a subnetwork centered on the Gal4 transcription factor. But recall also that this entire network consists of nodes involved in one single pathway: galactose utilization. So, when we look at the enriched GO terms in your BiNGO graph, which terms relate to galactose utilization in general, and which relate to the Gal4 subnetwork specifically? Here, we shall see how to answer that question.
- Return to your parent network. Verify that the sub-network centered on Gal4 is still selected. If it is not, repeat the steps to select Gal4, its immediate neighbors, and their immediate neighbors.
- Return to your BiNGO settings window, and change "Select Reference Set" to Test cluster versus network. Specify a new name in the cluster name box, such as "test2".
- Rerun BiNGO.
- Compare the new BiNGO network against the old one. You should see fewer significant GO terms in the new BiNGO network. Which terms are lost? These are probably associated with galactose utilization in general.
- Go to the Node Attribute browser, and click on Select Attributes. Note that the available attributes now include adjustedPValue_test (reporting enrichment against the completed genome) and adjustedPValue_test3 (reporting enrichment against the full network). Select these two attributes for a side-by-side comparison of the p-values of some nodes in the BiNGO graphs.
Congratulations! Now, you know almost as much about Gene Ontology as your instructor! Go off and do great things!
For comments or suggestions, please post to the cytoscape-discuss list.
Return to the Cytoscape advanced tutorials.
