Tutorial 2: Filtering and editing
Contents
If you have completed the Getting Started tutorial, this tutorial will introduce you to some advanced basics under Cytoscape. In this tutorial, you will:
- Apply filters to filter out low-confidence edges.
- Perform basic edits using the Cytoscape graph editor.
This tutorial features the following plugins:
The Network Filter plugin by Rowan Christmas at the Institute for Systems Biology
and the following datasets:
RUAL.subset.sif , a portion of a human interaction dataset published 2005 Oct 20 in Rual et al., Nature 437(7062):1173-8 and available at http://www.cytoscape.org/cgi-bin/moin.cgi/Data_Sets/.
Its attribute set RUAL.na , available at the same site.
Before starting, please download these datasets to your computer by right-clicking on the links to the files and saving them.
Begin by clicking here: WEB START (approximate download size: 22 MB) This starts Cytoscape on your own computer, after downloading the program and annotations from our website. Following the steps outlined in the Getting Started tutorial:
- Load the RUAL.subset.sif network file by going to the File menu on the Cytoscape desktop, then Import → Network (Multiple file types)..., and then specifying the location you have downloaded the file to.
- Load the node attribute file RUAL.na by going to File menu → Import → Node Attributes... .
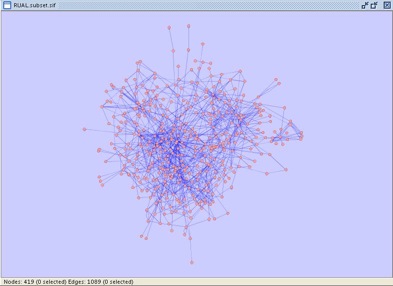
- Generate a yFiles organic layout for your network.
Your Cytoscape window should now appear as shown:
You can see the node attributes as follows:
- The node attribute file you have just loaded defines the official node name, called Official. To see how this attribute is specified, open the file RUAL.na with your favorite text editor.
In the Cytoscape desktop, under the Node Attribute Browser, click on the Select Attributes
 button.
 - Notice the attribute named Official HUGO Symbol. Select it by clicking on it with the left mouse button.
- Exit the menu with the right mouse button.
- You should now see two columns in the Node Attribute Browser, one labeled ID and one labeled Official HUGO Symbol. Select some nodes on the Cytoscape canvas. You should see their IDs (Entrez gene IDs, in this case), and their official gene names.
Using Filters
Your network contains several types of edges: Y2H yeast two-hybrid interactions, coAP GST pull-down interactions, and three types of literature-based interactions, listed in order of increasing confidence: non-core, core, hypercore. Verify this by examining the edge types under the Edge Attribute Browser. Remember that to select edges, you must first go to the Select menu on the Cytoscape Desktop, and then to Mouse Drag Selects... We will now use Cytoscape's filters to remove the lower-confidence the non-core edges.
- Go to Select → Use Filters from the Cytoscape desktop menu. This should open the Filters window in the Control Panel.
- In the Filters window, click on Options drop-down and select Create new filter.
- In the Filter Definition field, select edge.interaction in the drop-down. Click the Add button.
- In the Advanced field, in the interaction field, select non_core in the drop-down. Click Apply to apply the filter.
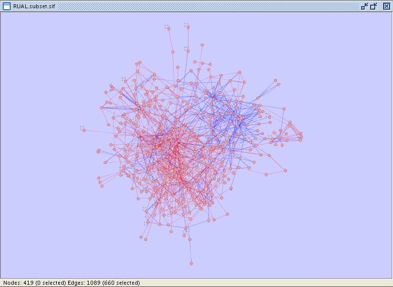
- Close the Use Filters window and verify that 660 edges have been selected. Your Cytoscape window should appear as shown below.
- Under Edit in the Cytoscape Desktop, select Delete Selected Nodes/Edges.
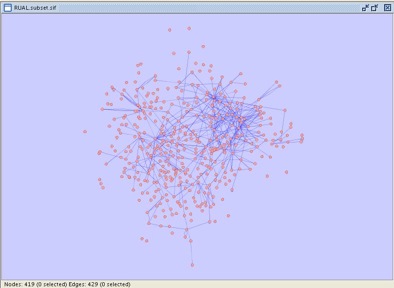
- Your Cytoscape window should now appear as shown:
Compared to the network you started with, the network you have now has fewer edges, but all the edges are determined either through experimentation or by higher-confidence literature-based methods. For some types of analysis, this is a more appropriate set of edges.
This will leave you with several nodes having no edges, which you may now want to filter out. Here is one method for doing so:
- Create another filter to select objects of type Edge with a value for text attribute interaction that matches the wildcard pattern *. This can be done in the same way as the previous filter, but this time type * instead of non_core in the interaction field under Advanced. This filter should select every edge on the canvas. Click the Apply and verify that all edges are selected.
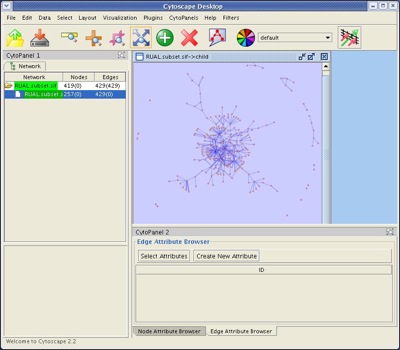
- Under the File menu, select New → Network → From selected nodes, selected edges. This should create a "child" network of 257 nodes and 429 edges.
- Apply the spring-embedded layout. This should generate a network as shown.
Note that this will not filter out nodes that only have self-edges. But at this point, such nodes are easy to select with the mouse and delete.
Editing
At times, it can be very useful to modify a network slightly: to add or remove nodes or edges. For instance, if you have prior knowledge of some biological process, you might want to add some nodes for proteins that you know are involved in the process, but that don't appear in your dataset. This section will describe how to do so.
- In the Control Panel at the left of the Cytoscape Desktop, click on the Editor tab.
- Add a node to the canvas by clicking the left mouse button on the node labeled Add a Node, and holding down the left mouse button, dragging it onto the Cytoscape canvas. You should see a new, blank node on your canvas.
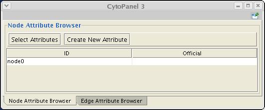
- Select the node with your mouse. In the Node Attribute Browser, you should see a node with ID of node0, as shown below:
- Give your new node a name by going to the Node Attribute Browser, clicking on the entry for the name, and entering a name under the column labeled Official HUGO Symbol. Notice that you cannot enter a new internal ID for the node.
- Enter an edge between your new node and some other node, as follows:
- In the Cytoscape Editor, click on Directed Edge.
- Holding down the left mouse button, drag the mouse from Directed Edge to your new node on the Cytoscape canvas. When you release the left mouse button, you should see two things: when the mouse is on top of your node, it should have a thick black border; and as you move your mouse away from the node, a thick black line should follow the mouse. Click on another node, and a new edge should appear between the two nodes.
- Create several new edges between your node and existing nodes.
- Delete your new node (and any edges attached to it) by selecting the node with your mouse, and selecting Delete Selected Nodes/Edges. Note that if you delete a node, any edges running to it are also deleted.
Congratulations! You are now finished the advanced course in Cytoscape menu operation. That is worth at least a nice snack!
For comments or suggestions, please post to the cytoscape-discuss mailing list.
Return to the Cytoscape introductory tutorials.
